Connecting a washing machine trap might not be something you have ever done before. If that’s the case, fear not – we’re here to help. Find out more about washing machine traps and how you can install a washing machine trap into your plumbing system for your machine with this handy guide.
Here’s what we have in store for you.
Table of contents
- What is a washing machine trap?
- How to connect a washing machine trap
- How to replace a sink waste trap with a washing machine trap
- How to clean a washing machine trap
- What is a washing machine lint trap?
What is a washing machine trap?
Washing machine traps are a type of plumbing trap. These are designed to hold a small amount of standing water within a curved pipe section. The standing water prevents sewer gases and foul odours from entering the room from the drainage system, whilst still allowing waste to pass through.
They can be installed in new or existing applications, meaning easy connection to the waste system when needed. This system will typically be connected to the soil vent pipe system. The same system is connected to the toilet, urinal and bidet.
It’s worth noting that it is illegal to put wastewater into your surface water system (the surface location is where water is collected by your gutters) unless you have an environmental permit. Learn more about wastewater discharging and legal requirements.
This type of trap should also not be confused with a washing machine lint trap, but the lint trap still serves a purpose. More information about washing machine lint traps can be found further down the guide.
Does a washing machine need a trap?
Approved Document H mentions that all points of discharge into your soil and waste system should be fitted with a trap to prevent foul air from the system from entering the building. It also outlines that under working or test conditions, traps should retain a minimum seal of 25mm of water or equivalent.
The document also states that there is a minimum trap size and seal depth. The diameter of the trap should be at least 40mm, and the depth of the seal should be at least 75mm of water or equivalent. Having said this, should the appliances discharge directly into the gully, you can reduce the depth of the seal to no less than 38mm if desired. Confirm with a professional if unsure prior to fitting your new trap.
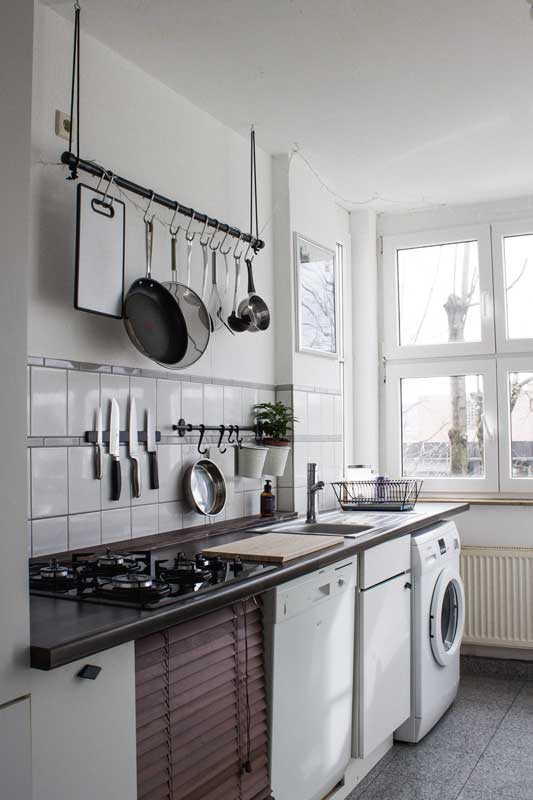
How to connect a washing machine trap
Although contacting a professional is advised, there are a few options for connecting a washing machine trap if you have the necessary DIY skills. Whichever method you choose, ensure that the water flow is turned off during this time to avoid the release of wastewater into the property. Also, confirm legal requirements via Approved Document H before performing this type of DIY.
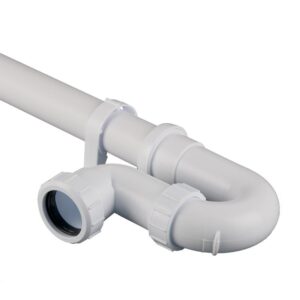
The first solution is hooking the washing machine hose into the top of a standpipe with a P-trap at the bottom. Then, once attached to the P-trap, run the pipe through the outside wall. This can then be attached to a hopper head or gully. An alternative is attaching the pipe directly to a soil stack. At the top of the standpipes should be an air gap. This will stop dirty water from draining back into the washing machine. Check with the machine manufacturer if a standpipe is a requirement or a suggested piece for a more suitable fitting.
Here are some steps to help you complete a washing standpipe with a trap. It’s important that during this installation, the sink outlet should not be plugged in and that there are no obstructions while the appliance operates.
What you will need
- Trap
- Standpipe
- Reciprocating saw or hack saw
- Pipe clips
Step one: Determine the appropriate height the standpipe should be from the floor via the appliance instructions, and position the standpipe adjacent to the appliance itself.
Step two: Once you’ve found where your standpipe should sit, secure it to the wall using pipe clips. If needed, use a saw to cut the pipe.
Step three: Connect 1½ of the waste pipe to the trap outlet, then filter the waste pipe through the outside wall to a nearby drain (confirm legal requirements if living in Scotland, as laws may vary). Alternatively, connect to the soil pipe or existing waste pipe.
Step four: Pick up the appliance discharge hose and place it into the standpipe. If you’re plumbing two domestic appliance discharge hoses into the standpipe trap, use V33WM fittings.
Step five: Test the installation as necessary.
How to replace a sink waste trap with a washing machine trap
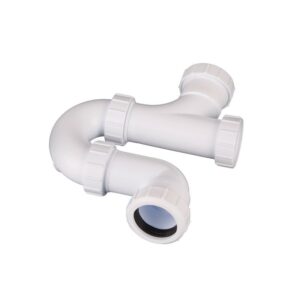
The second solution, recommended as the easier method, is to place the machine close to the sink. To do this, change the sink trap to a washing machine trap. This will have an inlet for the waste hose above the trap. From there, you can install a non-return valve. Again, this will stop wastewater from falling back into the machine. An alternative to this is fixing a hook to the underside of the work surface, followed by tying the hose to it so it can run higher than the sink overflow level.
Here are some steps to help you install a trap in your system near the sink! Again, it’s important to note that during this installation, the sink outlet should not be plugged, and there are no obstructions while the appliance operates.
What you will need
- Trap
- Reciprocating saw or hack saw
- Hose clips
Step one: Attach the trap inlet nut to the sink waste outlet, then attach the trap outlet nut to the waste pipe. Refer to the manufacturer’s instructions to determine which nut is which.
Step two: Next, ensure that the washing machine trap allows water to pass through. Use the saw to cut off the end of the nozzle or, if the trap has one, remove the blank cap from the trap and push the hose over the nozzle. This will need to be tight-fitting, so secure this using a hose clip.
Step three: Determine whether the discharge hose reaches appliance height or sink overflow – the hose should reach whichever is highest – and clip to this point using the hose clip.
Note: If there is no overflow, this will be the flood level.
Step four: Test the installation as necessary.
How to clean a washing machine trap
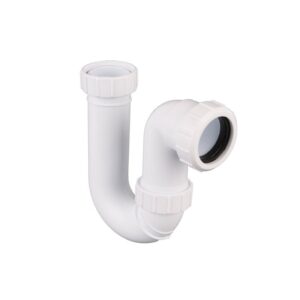
This will depend on the type of trap you have. However, as outlined in Approved Document H, if your trap forms part of an appliance, then the appliance should be removable. All other traps should be fitted directly after the appliance and be removable or fitted with a cleaning eye. A recommended trap is the washing machine P-trap with a cleanout plug. This type makes it easier to remove obstructions that might have collected in the P-trap over time.
What is a washing machine lint trap?
The washing machine lint trap, also known as a lint filter, is a type of trap that prevents lint and similar excess material (such as residue from cleaning detergents and fabric softeners) from ruining clothes during a cycle. The placement of the lint trap will typically depend on the make of the washing machine. Typically, high-efficiency systems won’t have this feature and are often replaced with self-cleaning, built-in pump filters. You will need to refer to your appliance manual for information to determine if and where your appliance has a lint trap.
If no information is available, you can check specific places to see if there’s a possibility of a lint trap being part of the machine. Possible locations can include:
- Centre of the agitator – usually a common placement for a top-loading washing machine, remove the cover to check for this type of lint trap.
- The top rim of the washing machine drum – this is where you can potentially find a removable lint screen.
- Washing machine drain hose – mesh lint traps can commonly be found here
If you still cannot find the lint trap, contact someone familiar with the make of the washing machine. Attempt to contact the manufacturer or a professional plumber if possible.
How do you clean a washing machine lint trap?
Cleaning can be fairly simple, but it will depend on whether the lint trap is removable. If you have found the trap and can safely remove it, soak the lint trap or filter in hot water. You can also use a soft brush or towel to remove lint and other residues as you do. If you cannot clean the filter, contact the manufacturer or a professional plumber with experience with the make of the washing machine. You can also prevent future clogging by ensuring all clothing pockets are empty before loading the machine.
Note: If your filter is disposable and causing clogging, replace the lint trap to reduce future washing machine obstruction or damage.

Was this guide useful?
Mentioned in this project guide: