Using copper pipes in conjunction with water has been around for thousands of years. In the 1940s, copper was recognised as the most used material for plumbing in the developed world. However, like many materials used for construction, copper pipes are not untouchable to the elements. In time, they can grow weak, damaged by various issues such as frost, falling objects and erosion, among others. This can result in leaks.
With what we have just covered in mind, we have taken the time to highlight some of the different causes of leaking copper pipes and how to repair them with some simple pointers.
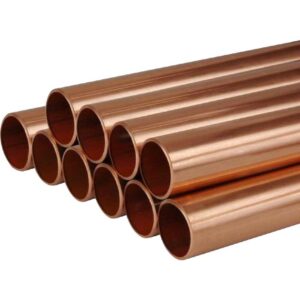
Table of contents
Types of copper pipe damage
Leaking pipes issues can vary. Here are some of the most common issues copper pipes can face over time.
Copper pipe corrosion
Corroding copper pipes are a common issue. The distinct colours typically mean that the pipe is reaching the end of its use. Knowing what each colour means can help identify the issue that the pipe is suffering from.
The impact of the corrosion will depend on the level of wear across the system. You will also need to consider how many repairs or replacements have occurred over time. If you have maintained the system well and regularly, you reduce the risk of needing an emergency plumbing solution.
Corrosion can also be caused by types of chemicals or processes that occur over time. Common corrosion causes include exposure to:
- PH levels below 7.0
- PH levels above 8.5
- High levels of dissolved O2 (oxygen)
- High levels of TDS (Total dissolved solids)
- Bacteria (e.g., sulphate, iron etc)
- Electrical-chemical (e.g., lightning strikes or incorrect installation of electrical appliances to the water pipe)
- Water levels at high velocity
- Sand, sediment and grit moving with the water through the pipe
- Incorrect pipe installation
With many unique causes of corrosion, ensure you have a maintenance plan in place and know the signs as indicated below.
| Corrosion colour | Issue |
| Blue or blue/green | Corrosion Can occur inside the water pipe and can be indicated if water is coming out of a source, such as a tap, in a similar or the same colour Exterior discolouration can indicate a pinhole leak |
| Green | Possible corrosion Water leaks are likely inside copper pipes Can cause stains on clothes, sinks, fittings and other things connected to or touching the system |
| Black | High sulphur or other chemical levels in the air it’s exposed to (e.g., sewer gases) Can also be caused by contact with materials that are not compatible with copper (e.g., galvanised steel) Cheaply installed copper contains a high number of impurities, which can become more established over time on the pipe surface. |
Cracked copper pipe
Cracks are likely to occur at one time or another, especially if parts of the pipe network is exposed to falling objects. Should a crack appear or be caused at any time, you must ensure it is dealt with as soon as possible.
Burst copper pipe
Burst copper water pipes are caused by water pressure inside the pipes. If it gets too much, for example, during colder temperatures where the pipe freezes, and the frozen water expands, the pipe can burst/break open. This results in notable damage that can potentially require repairs, and in more serious cases, a full system change. Not to mention a clean-up job on your hands! This is more common with unprotected pipes, but it can also happen to existing protected systems.
How to repair a leaking copper water pipe
Repairing leaks in copper pipes is not a one-size-fits-all job. There are various ways to repair a leaking copper pipe, both temporarily and permanently. It depends on the level of damage you’re faced with. Once you have identified the location of the leak, you can begin your repair. Learn short and long-term repairs via the list below.
Pipe clamp
This method is a fantastic temporary solution if you’re waiting for the parts to do your repair or if you’re waiting for an appointment with your local tradesperson to complete the job.
What you need:
- Pipe repair clamp
All you need is the size of your copper pipe, then choose the clamp that will fit around it. The Kibosh repair clamp is a popular choice favoured by many DIYers and those in the trade. Once you have that all ready, clamp the product to the leaking area of the pipe and voila! temporary pipe repair. It’s also one of the products that can be reused in the event of another leak. So, not only is it time-saving but cost-effective, too. It’s important to note that the clamp(s) must be removed before the permanent repair is done.
Soldering pinholes
Pinhole leaks are small but still damaging. This solution could be a nice temporary, easy fix to ensure your system works efficiently while you wait to perform a permanent fix.
What you need:
- Solder tool
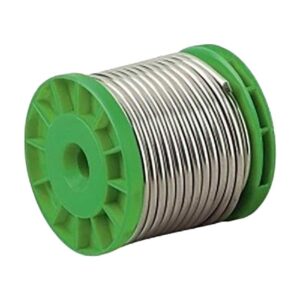
- Solder
- Solder flux
Turn off the water at the mains to ensure no water is coming through and drain excess water from the lowest point in the house. Once that’s done, clean the pipe with an abrasive cloth material and wipe over some soldering flux to prepare for soldering. Now begin to solder the hole shut. At this point, the flux should change colour as you solder up the hole. You can now use the water as intended, but ensure a permanent repair is in place as soon as possible to prevent the hole from opening again.
Copper wire
If you need a temporary fix for a leak caused by a larger hole, this method can be key for keeping your system running while you wait to perform a permanent repair.
What you will need:
- Copper wire (also known as electrical wire)
- Abrasive cloth
- Pliers
- Solder tool
- Solder
- Solder flux
As with any leaking system, turn off the water at the mains to ensure no water flows through your pipes as you work. Take your copper wire and clean it with a cloth. You will also need to clean the pipe where the leak is. Now wrap the copper wire tightly around the area with the leak. Tighten this with a set of pliers and solder the copper wire to create that all-important temporary seal.
Pipe repair tape
Leaking pipe tape (aka plumbers’ tape) is a cheap, water-resistant solution. This repair is temporary as it cannot last long against the pressure of the water. While it can be difficult to use around areas where the pipe is against a surface or obstructed, and you must ensure that you can wrap the tape around the pipe effectively, this is still a handy short-term solution for homeowners.
What you will need
- Pipe leak tape
Simply wrap the tape around the leaking location of the pipe several times, ensuring that the area is fully covered. Follow this up by having a permanent repair sorted out as soon as possible.
Epoxy putty
Epoxy putty is typically manufactured with two main components that create an adhesive to fill holes or cracks to plug the leak, finally letting it set as a hardened surface. This solution, like the repair tape, is temporary and should only be used as a quick fix before applying a more permanent solution.
You must also check that no hard chemicals are in the putty, especially when applying it to a copper pipe used for drinking water. This is because the chemicals can contaminate and remain in the water, causing harm to consumers. So, ensure your epoxy putty has WRAS approval.
What you will need:
- Epoxy putty (WRAS approved)
- Pipe bandage
Make sure the putty is moulded together, then plug and wrap the putty around the pipe to stop the leak. You can also use a copper pipe bandage to secure it further and ensure the putty sits in place if desired.
If you have any trouble with any of the methods, contact a professional and arrange a suitable leaking copper pipe repair as soon as possible.
Couplings
This method is a common permanent fix and a go-to for immediate pinhole, burst or perforated pipe.
What you need:
- New pipe to replace the damaged area
- X2 couplings that match the size of the pipe
- Copper pipe cutter
- Utility knife
- Solder and soldering tool
- Abrasive cloth
Once you have your pipes, turn off the water to ensure nothing is flowing through the system. This will stop it through a valve or at the mains. Use a pipe cutter to remove the damaged section of pipe. Smooth out the roughness on the inside of the leftover fixed copper pipe with your utility knife in a process known as deburring; this can help with the flow following the replacement of the new section of pipe. With that, you can now add the new section of pipe in place by putting the couplings on the end of the cut pipe section and inserting the new pipe between them as needed. You will need to solder the pipe around both side edges of each coupling to hold it in place. You can clean off any excess around the pipe with an abrasive cloth and check for leaks.
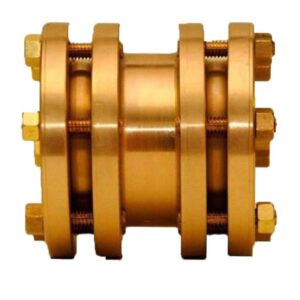
Compression couplings
If you’re a fan of easy repairs, this process is great for you as a permanent solution.
What you need:
- Compression couplings (should include the fitting, a sleeve and a retainer nut)
- Copper pipe cutter
- Wrenches x2
- Pipe dope
Turn off the water at the mains to ensure nothing is flowing through the system. Cut off the damaged part of the pipe. Now you can insert the new piece of pipe with the compression pipe couplings. Apply pipe dope to the new connecting pipe sections for a more secure, sealed fitting. You can now use your wrenches to tighten the nuts. Now turn on the water to check for any leaking around the couplings. If there is a leak, adjust the tightness of the nut around the pipe.
Slip couplings
If soldering isn’t your strong suit, that’s where the slip coupling comes in, as it’s perfect for quick and simple repairs on a leaking pipe. With very few tools, you can replace the copper pipe quickly and efficiently.
What you need:
- Slip coupling
- Copper pipe cutter
- Marking tool
- Utility knife
- File
- Wrench (optional)
Firstly, turn off the water at the mains to ensure nothing flows through the system as you work. Mark where you need to cut the pipe with a pipe cutter by holding the coupling up to the damaged area of the pipe. Remove the damaged section as needed. Smooth out the roughness of the leftover fixed pipe inside using your utility knife and repeat this process on the outside of the pipe with a file. Now, find the end that can slip onto the pipe and slide the coupling onto one of the pipes. Ensure there’s enough space to slide the other pipe into the opposite end. Push to mark both areas on the leftover pipe.
With all these different options, you can easily make repairs swiftly without worry. If you would like to learn more about our copper pipe repairing products or pipes in general, explore our website or contact our friendly customer service team for support with your enquiries.

Was this guide useful?
Mentioned in this project guide: