Pipe insulation or pipe lagging comes in various materials. So, how exactly do you cut your insulation safely and to your requirements? Find out how you can cut pipe insulation to fit around corners, T sections and more to ensure you’re all set to install the insulation successfully.
Table of contents
- How to cut pipe insulation
- How to cut foam pipe insulation
- How to cut fibreglass pipe insulation
- How thick should pipe insulation be?
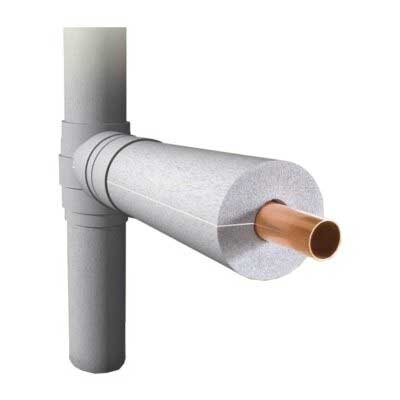
How to cut pipe insulation
Nowadays, many manufacturers offer the option of pre-cut insulation to your desired length and angle. However, what happens when you can’t get the correct pre-cut piece of pipe insulation and need to take care of it yourself?
First things first, you’ll need to take into consideration these two requirements:
- What size pipe insulation do I need?
- How thick should pipe insulation be?
Once you’ve got those answers, you can begin the process of cutting your pipe insulation.
If you’re working with existing pipe insulation, whether it’s adjusting the size or removing old insulation, you will need to know if any asbestos is present. Asbestos is more likely to be in insulation in older homes. It was a very common material used in insulation in the 20th century.
How to identify asbestos pipe insulation
You can identify asbestos from its appearance. Asbestos typically flakes and powders when used as a protective coating in or on heating systems.
You must be careful when trying to identify it, as it is considered one of the most dangerous materials used. Wear protective gear such as masks and protective glasses to avoid the risk of fibres being breathed in or getting into your eyes.
The Health and Safety Executive site offers insight into identifying asbestos and its dangers via their lagging and insulation guide. You can also preview the following official documents regarding asbestos via the government website.

How to cut foam pipe insulation
Foam pipe insulation is one of the most used materials for piping systems because it is easy to cut and install with the right know-how. All you need is a few simple steps to begin.
Cutting foam pipe insulation to length
This is your basic cut across the width of the pipe insulation to ensure it fits well into specific areas at the right length.
What you need:
- Mitre box
- Cutting tool (i.e. box cutter)
- Pipe insulation tape
Step one
Place your mitre box on a flat surface and lay the foam pipe insulation down along the free space between the sides.
Step two
Determine what angle you need to cut your insulation (for example, 45 degrees). Then place your cutting tool in the suitable space in the sides of the mitre box to cut at the desired angle.
Step three
Cut your insulation as needed to the angle and length required. Then cut across the length of the pipe to provide an opening.
Step four
Open the pipe insulation at the length cut and wrap it around the pipe as required, using insulation tape to secure it in place.
Cutting foam pipe insulation to fit around a corner
The right angle is a common feature in many systems. Here’s how to get around it with a simple cutting process.
What you need:
- Mitre box
- Cutting tool (i.e. box cutter)
- Pipe insulation tape
Step one
Place your mitre box on a flat surface, then lay the pipe insulation down along the free space in between.
Step two
Cut off one end of the insulation at a 45-degree angle, then repeat the process on a separate insulation tube so that you now have two separate tubes with 45-degree angles cut at one end of each.
Step three
With the 45-degree cuts, your tube pipes should now be able to be easily joined together to create a 90-degree bend.
Step four
Use your newly cut pipe insulation to secure the tubes in place.

Cutting foam pipe insulation to fit a T pipe
This cut will be key for areas in the system where T joints are apparent.
What you need:
- Cutting tool (i.e., box cutter or utility knife)
- Marking tool
- Pipe insulation tape
Step one
Identify where you will need to cut the pipe insulation (typically the centre of the lagging) and mark for a 90-degree wedge cut to be made.
Step two
Make the wedge cut with your cutting tool, ensuring it only goes to the centre of the tube and not through the other side.
Step three
Take a second piece of foam pipe insulation and cut the end of it to match the wedge cut shape and size when slotting it into place.
Step four
Wrap the insulation around the sections as needed and join these together to cover the T joint, using insulation tape to secure it in place.
Cutting foam pipe insulation to fit around a bend
Sometimes corners are more than just simple right angles or T sections. Sometimes you need to get crafty with the cuts to fit around curved sections of the system.
What you need
- Mitre box
- Cutting tool (i.e. box cutter)
- Pipe insulation tape
Step one
Put your mitre box on a flat surface. Lie your pipe insulation down along the free space between the sides – make sure the slit along the length of the pipe is facing upwards.
Step two
Make two cuts at an angle of 30 degrees that sit next to each other and reach, but do not go straight through, the other side of the pipe insulation.
Step three
Fit the pipe insulation around the angle with the cuts facing inwards, towards the curve of the pipe.
Step four
Seal the joints and the areas with the cut-outs using tape.

How to cut fibreglass pipe insulation
Before you start, ensure that you have protective equipment to prevent inhaling fibres or any accidental contact with your eyes. Splinters are also a risk, so ensure you have protective glasses, plus a mask and thick gloves to protect yourself.
Just like foam, fibreglass can be easily cut with a cutting tool. This can be any of the following:
- Saw (jigsaw, reciprocating saw, circular saw, hacksaw)
- Router
- Cut-off wheel
The processes of cutting fibreglass insulation are also quite like cutting the foam option, but as with any material, there are various considerations to take on board.
Cutting fibreglass pipe insulation to fit around a pipe with a union fitting
When fitting pipe fibreglass insulation, you will need to take into consideration the union fittings. Here is what you can do to deal with this issue when cutting the fibreglass pipe.
What you need:
- Protective glasses
- Protective mask
- Thick gloves
- Cutting tool (utility knife)
- Marking tool
Step one
Identify the union fitting placements before opening the insulation and placing it around the pipe – not fixing it in place yet.
Step two
Draw or cut a mark on both halves of the interior of the insulation using a cutting tool on both sides of the pipe insulation to identify where the union fitting will sit.
Step three
Remove the pipe insulation and place it open on a flat surface to ensure that the two halves of the inner side of the insulation are facing outward.
Step four
Cut into where your marks were placed and cut into the insulation deep, but not going through the other side of the insulation.
Step five
Gently pull away the insulation you have cut around and want to remove from the halves to create the space for the union fitting to sit in and be covered by the insulation.
Step six
Line up the insulation to fit around the pipe and the union fitting as needed, and close fully so that both halves join.
Note: If the insulation does not close, adjust notch depth and size as needed.
Cutting fibreglass pipe insulation to fit around a pipe with valves and T sections
Other obstructions, such as valves and T sections along the pipe, can be fiddly but not impossible to wrap insulation around.
What you need:
- Protective glasses
- Protective mask
- Thick gloves
- Cutting tool (utility knife)
- Marking tool
Step one
Hold the insulation against the pipe and mark where you will need the sections to be cut and placed over the fittings.
Step two
Where you have marked the insulation, cut holes that will fit around said valve(s) and or T section(s), followed by slits in the backing paper to ensure it fits around the fittings.
Step three
Open the insulation so that you have two halves and carve into the interior of fibreglass, taking a layer at a time to avoid taking too much, so the insulation fits around the valve(s) as needed.
Step four
Make sure the adhesive strip is facing you and fit the insulation securely around the pipe.
Note: If you need to adjust the insulation to fit around the T and valve sections at all, remove it from the pipe and trim accordingly.
Step five
If everything fits as desired, remove the protective cover from the adhesive strip on the backing paper. Pull it towards you to stick onto the front section of the paper on the insulation for a tight fit.

How thick should pipe insulation be?
Typically, your pipe insulation’s thickness is determined by the thickness of the pipe. Though other factors for choosing how thick your insulation will include:
- Location (domestic or commercial)
- Size of the pipe
- Purpose of the pipe
It’s also worth noting that Approved Document L states specific “minimum thicknesses of pipework insulation for hot water services and space heating applications using high-performance insulation” via a table. However, some basic information to know about what you need to use for domestic or commercial pipe insulation is as follows.
Domestic property pipe insulation breakdown:
- Choose insulation with at least one inch worth of thickness if trying to have the most cost-effective solution or pipes that are three inches or smaller.
- Choose insulation with at least one to two inches worth of thickness if you have pipes that are eight inches or bigger.
- Ensure to insulate cold water pipes situated in hot or humid locations to reduce condensation.
- Fibreglass pipe insulation is commonly used for residential pipe systems. You can find out more about fibreglass insulation for water pipes in the section below.
Commercial property pipe insulation breakdown:
- Choose insulation with a thickness of half an inch (13mm) if a pipe has a temperature of 148.889°C (300°F).
- Select insulation with a thickness of one inch if a pipe has a temperature of 204.444°C(400°F).
- Opt for insulation with a thickness of one and a half inches if the pipe has a temperature of 260°C (500°F).
- Fibreglass pipe insulation is commonly used for commercial pipe systems, but it must follow regulations when used in commercial spaces. You can find out more about fibreglass insulation for water pipes.
If you are still unsure about choosing the right insulation or cutting the insulation, speak to a professional.
Want to find out what the right insulation is for your water pipes? Look to our guide to find out the best way to insulate your water pipes, or contact our friendly customer service team, and we’ll happily support you with your queries.

Was this guide useful?
Mentioned in this project guide: