10th February 2026
Sealing a new, or even an old, bath or shower area doesn’t have to be a hassle. Take a look through this guide to discover how you can add or replace bathroom sealant to your new bathroom feature.
Table of contents
What you need
- Safety equipment (gloves and glasses)
- Masking tape
- Safety knife or flat-headed screwdriver
- Caulking gun
- Silicone sealant
- Silicone applicator or a round-headed tool
How to apply sealant to a bath
Read through these simple steps to understand how to use bath sealant to ensure your bath not only contains water but has a clean design, too.
Please note: Ensure the area is clean before application by removing all old sealant and ensuring dirt, grease, etc is removed.

Step one: Planning for the sealant
Use masking tape to mark where you’ll apply the silicone around the edge of the bath. Keep the tape at least 3mm from the wall and work from the corner furthest from your bathroom door. Once this has been done, you’ll need your safety equipment from here on out.

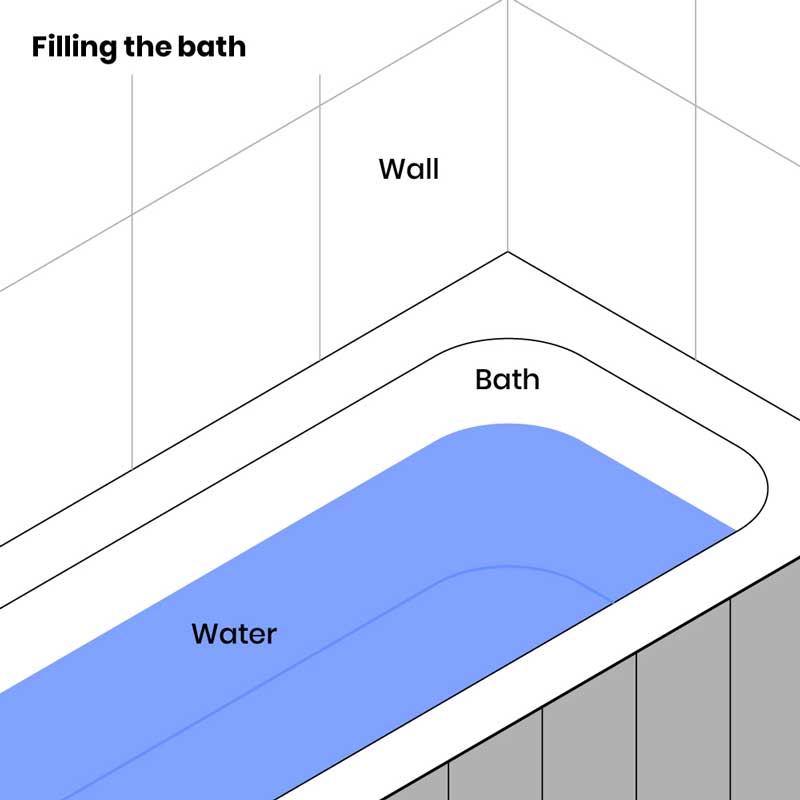
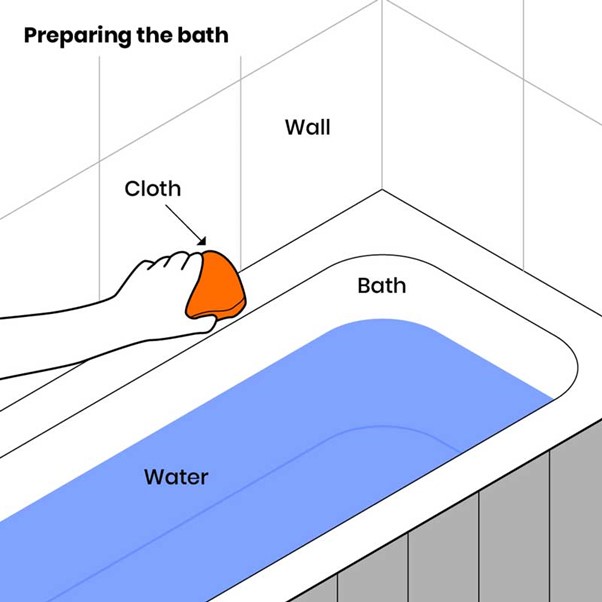
Step two: Filling the bath
Fill the bath with water and leave it filled. This can help you apply the sealant neatly, test its strength and give you a true idea of whether the sealant will work when the bath is in general use after application. Keep in mind that sealant can take up to 24 hours to set. So, prevent the use of the bath or shower until the sealant is dry, and leave the bath filled with water.
Step three: Preparing the sealant
Use a knife to cut the silicone sealant open. Cut the tip as close as possible to a 45-degree angle and attach the head or nozzle of the silicone. You can then insert the silicone into a caulking or silicone gun and proceed to apply the sealant.
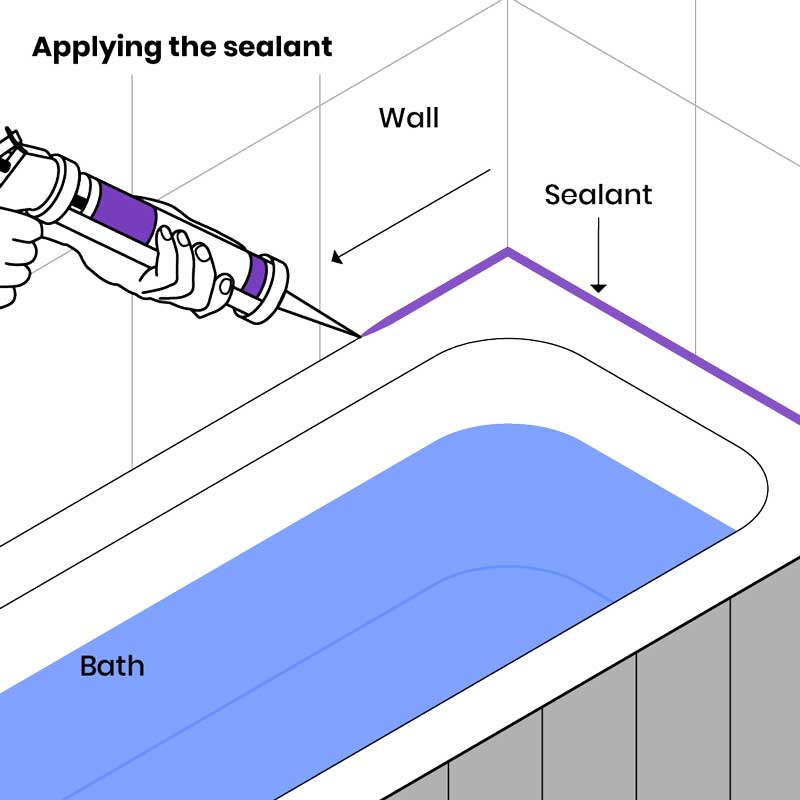
Step four: Applying the sealant
Get as close to the bath as possible, where you plan to apply the sealant. Like with the tape, start with the corner furthest away from the door, as this will ensure you don’t touch the new silicone put down.
Example: for a bath surrounded by three walls, use a ‘C’ motion going from the ‘top’ of the bath.
You can now begin applying the silicone solution with the caulking gun – apply silicone to both the base and the wall if possible.
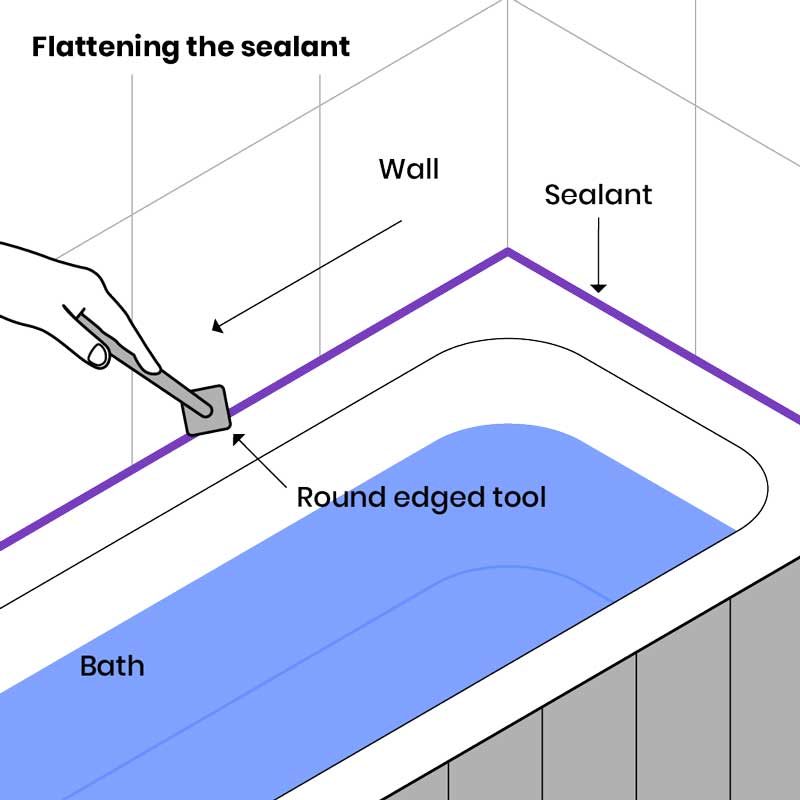
Step five: Flattening the sealant
Lumpy sealant has an unpleasant appearance and risks increased build-up of dirt within the tiny grooves or behind the sealant. Using a wet round-ended tool (or sealant applicator if you have one), smooth out the sealant at an angle so that the sealant can support the watershed back into your bathtub.
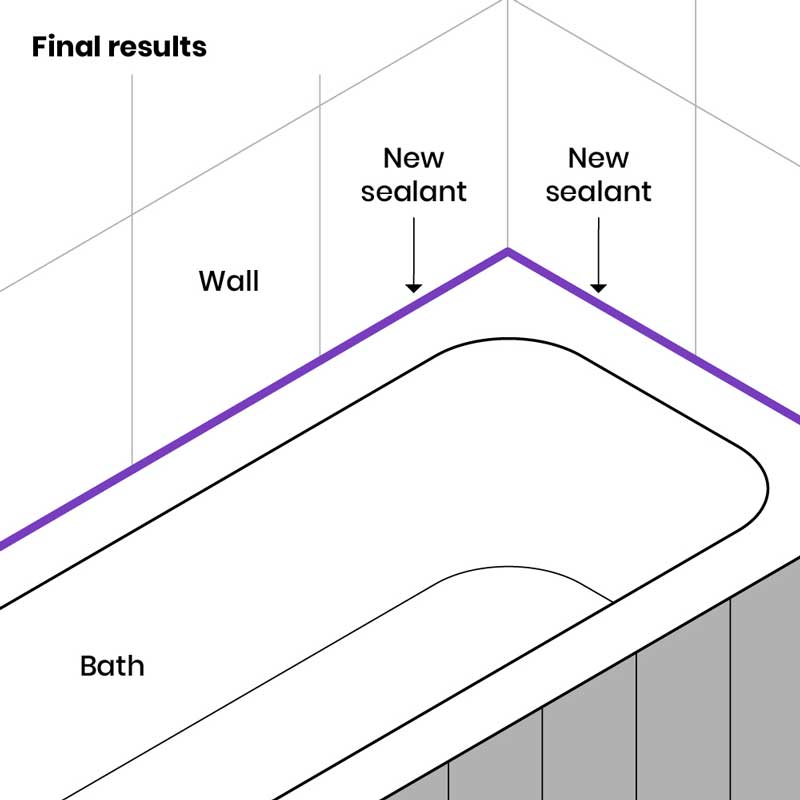
Note: Remember not to let anyone use the bath or shower during the 24-hour setting time and leave the bath filled until the sealant has set.
Your brand-new sealant is applied! Enjoy your fresh, new sealant and know your bath can now drain successfully.
Step seven: Adjusting the bath
Some bathtubs might not be as close to the wall and, as such, will need adjustment. Sealing the larger gaps between a bathtub and a wall can be done. Simply remove silicone or grout (if any) already there and move the bath closer to the wall. You can now seal the bath as normal.
If you decide not to adjust the bath’s position, there are two things you can do:
Method 1
Plug the gap with an adhesive and bonding material – once dry, seal the bath as normal.
Method 2
Use flexible caulking strips (self-adhesive tape) by cutting the tape to the required length and gap size, then peel off the backing and press the strip into the place where the gap needs to be covered.
How to remove sealant from a bath
Remove existing sealant (whether it may be damaged, old or covered in mould) by cutting it with a knife (preferably a ‘safety’) and then lifting and scraping it away with a flat-headed screwdriver.
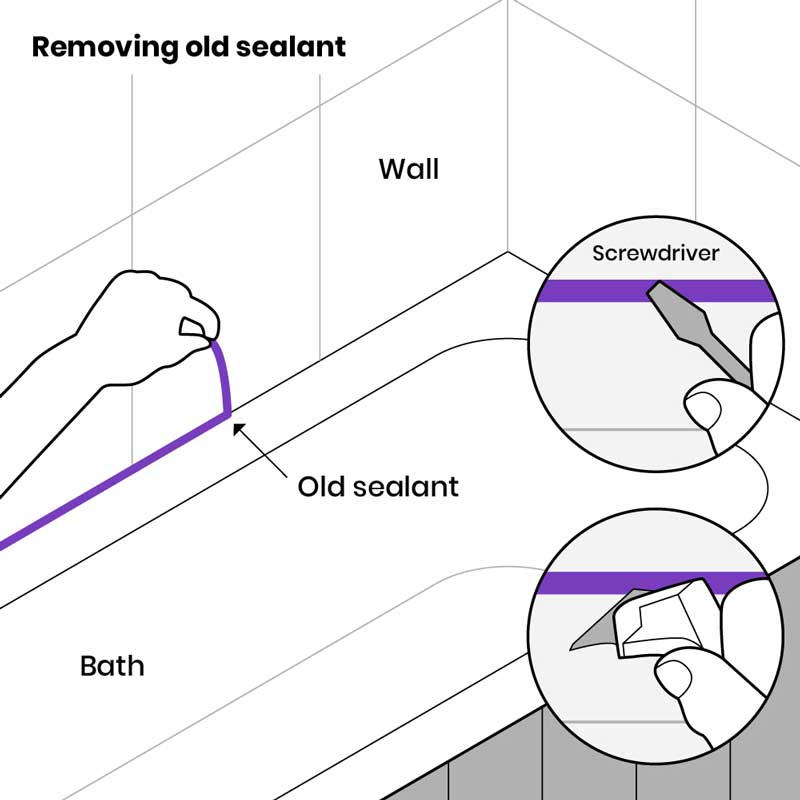
If there are any remaining strands of sealant, you can remove the leftover sealant using your finger, white spirit (turpentine), or an old cloth by rubbing it over the strands. Warning: don’t be too aggressive, as you risk scratching or damaging the tile or wall surfaces.
Was this guide useful?
Mentioned in this project guide: