9th February 2026
Rusty old tap fixings can ruin the appearance of an elegant new basin. Even if you’re not going for a full bathroom renovation, simple wear and tear can take a toll on your bathroom taps. This can lead to leaks and unhygienic conditions.
Luckily, changing bathroom taps is easily done in five simple steps. So, if yours are well past their use-by date and you’re wondering, ”Are taps easy to replace?’ or ‘Can you change your taps yourself?’, the good news is you can!
Changing bathroom taps is easily within the grasp of a competent DIYer. In this guide, you can discover how to replace taps in your bathroom like a pro.
Table of contents
How to change a tap in your bathroom
Once you’ve bought your brand-new replacement taps, you’re good to go.
All you need are a few standard tools, which are normally found in every DIYer’s toolbox.
These are:
- Adjustable wrench or bath tap spanner
- Screwdriver
- Elbow grease (optional)
When you’ve assembled everything, simply follow these steps.
Step one: Switch off the water supply
Before you do anything else, you must turn off the water supply to the taps you intend to change. Otherwise, you’ll end up flooding your bathroom and making a mess.
Keep in mind that some taps come with isolation valves under the sink, so check for those first. If that’s not the case, you’ll have to switch off the mains water supply.
Now that’s done, open the taps and wait for any remaining water in the system to drain.
Step two: Remove the old bathroom tap
Get under the sink and use your wrench or spanner to unscrew the nut which secures the tap to the basin. This step is often the trickiest, especially if the nut is really tightly screwed. This is where a little elbow grease might come in handy.
Once the nut has come off, lift the old tap carefully and remove it. Clean the tap hole area thoroughly, removing any dirt, debris and remaining adhesive.
Then, provided the fittings are not damaged and you don’t need an adaptor, you can go ahead and fit the new tap.
Unless you’re dealing with a really old plumbing system, however, neither of the above scenarios is particularly likely. Besides, adaptors are readily available, so you shouldn’t have any trouble finding one that’s the right size.
Step three: Install the new bathroom sink tap
Start by unscrewing the nut from the new tap. Feed the thread through the tap hole and place the tap in the appropriate location. Then, go back under the sink and hand-screw the nut before tightening it with the wrench or spanner.
Bear in mind that the tap shouldn’t move around while you’re doing this. So, it’s a good idea to have someone hold it firmly in place if the basin is too large and you can’t quite reach it yourself.
Step four: Connect the plumbing feed pipes
Proceed to connect the supply pipes to the new tap. If you’re working with a mixer tap, ensure the correct feed goes into the correct thread. The threads on most modern taps are colour-coded, with red always on the left and blue always on the right.
Why? Well, there’s a very good reason for this—to help visually impaired people.
Now, use your wrench or spanner to ensure everything is nice and tight—but not too tight.
Step five: Switch on the water supply
Close the new tap and switch the mains water supply back on.
Pro tip: To keep everything under control and prevent a sudden build-up of pressure, leave your bath tap (or shower tap, if you have a shower cabin) on before you switch the mains water back on. This way, you’ll avoid any sudden bursts of water coming through the new tap, even if there’s something not quite right with the way you’ve installed it.
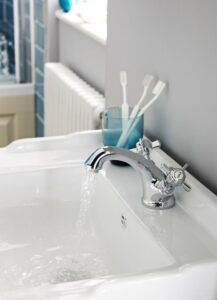
Finally, open the new tap and check for any leaks.
In case of minor leaks, you might have to tighten the connections a little. But other than that, you should be all set to enjoy your shiny new bathroom tap!
Do I need a plumber to change my taps?
Changing taps on a sink is a pretty easy DIY task. So, no, as long as you have basic DIY skills, a few simple tools and sufficient time on your hands, you should have no trouble replacing taps on your own.
How much time? Probably between half an hour and an hour, depending on the type. It might take you a tad longer if you’re replacing contemporary mixer taps instead of the pillar taps traditionally found in most UK homes, but the process is virtually the same.
So, it’s a fairly easy process, but we’d be lying if we said it’s a pleasant one. After all, you do have to get under the sink and get your hands dirty.
Still, unless the old taps are so tight that they’re impossible to unscrew without professional plumbing equipment, you’ve got nothing to worry about.
Final thoughts
Bathroom taps are among the most heavily used items in any bathroom – especially so in larger households.
This means that, sooner or later, you’ll have to replace a tap or two. Luckily, there’s no need to despair.
As we hope we’ve made clear in our guide, changing bathroom taps is not exactly nuclear physics. That’s why every homeowner should at the very least know how to do it.
And now that you, too, are familiar with the process of replacing taps in the bathroom, you won’t have to call a plumber the next time you’re faced with a rusty, leaky old tap.

Was this guide useful?
Mentioned in this project guide: