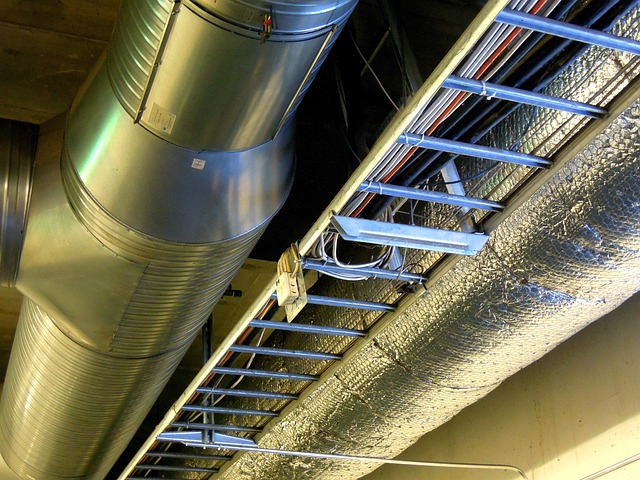
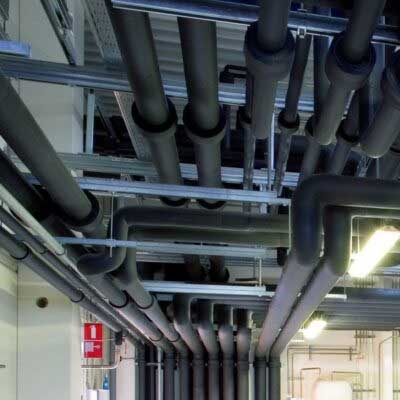
As the focus on reducing emissions and improving energy efficiency grows, insulating the pipes within a building has become more important.
Although often forgotten, insulating pipes within your home can not only reduce your energy bills but also help to keep your home warmer and more efficient and avoid issues that can become costly.
The best part? Insulating a pipe isn’t as difficult as you might imagine at first. With that in mind, let’s learn how to insulate a pipe!
Table of contents
- Why insulate a pipe?
- Which pipe insulation do I need?
- How to install foam pipe insulation
- How to install pipe wrap insulation
- Top tips to ensure pipe insulation performs well
Why insulate a pipe?
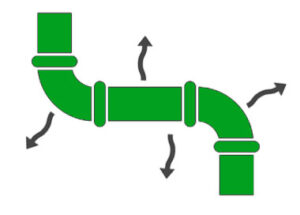
Insulating pipes within the home can provide several benefits, and pipe insulation can be used on both hot and cold pipes.
Let’s take a closer look at each one.
Reduce heat loss
On hot pipes, pipe insulation prevents heat from being lost to the surrounding area, keeping the water temperature around 2 degrees higher than it would be without the pipe insulation.
This means that less energy is required to heat the water, which in turn reduces the cost of your utility bills.
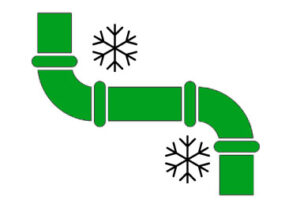
Prevent freezing
On cold pipes, pipe insulation is used to prevent the pipes from freezing during cold weather. Freezing pipes can cause several issues. This includes cracked pipes, flooding and blocked water systems, which can all be costly to fix.
Pipe insulation on cold pipes is important, particularly in exterior walls, unheated spaces such as lofts, and in below-ground applications, where pipes are more prone to freezing and harder to access.
Insulating the pipe increases the temperature of the pipe and reduces the extent to which weather conditions can affect it, which reduces the potential for pipes to freeze.
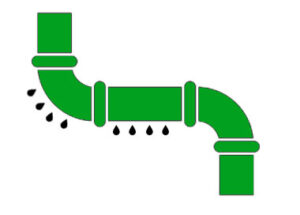
Prevent pipe sweating
Pipe insulation can also be used to eliminate pipe sweating and humidity. When cold pipes come into contact with warm, humid air, the water vapour condenses on the surface of the pipe.
In turn, this creates condensation, which drips onto the floor or other surfaces below, creating puddles and dampness as well as high humidity, which can lead to mould and rot. The best pipe insulation will prevent condensation from occurring on the pipe surface, reducing pipe sweating and minimising the humidity.
Which pipe insulation do I need?
There are several different pipe insulation products available to add layers of insulation to your pipes within the home or other buildings.
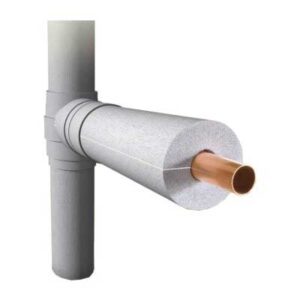
Polyethylene foam pipe insulation
Polyethylene foam insulation is one of the most popular forms of pipe insulation available. The polyethylene tubing is a closed-cell foam pipe insulation used in a range of applications, including insulating central heating pipework to reduce heat loss, and in loft spaces to prevent freezing.
Generally consisting of a hollow foam tube with a slit down one side, the design of polyethylene pipe insulation allows it to fit over existing pipework and is considered a great choice for low cost and good performance.
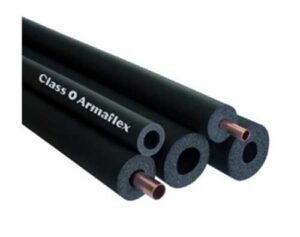
Rubber pipe insulation
Rubber pipe insulation products, such as those from Armaflex from Armacell, are a closed-cell, elastomeric rubber pipe insulating system. Most commonly used to prevent condensation and humid environments, rubber pipe insulation tends to have high water resistance. However, it can also be used for thermal insulation due to its low thermal conductivity.
In addition to these features, rubber pipe insulation is relatively resistant to mould and bacterial growth. This occurs in humid environments, and some rubber pipe insulation products also have anti-microbial protection built in to provide extra protection.
Self-seal pipe insulation
Self-seal pipe insulation can be manufactured from several different materials, including rubber and polyethene foam. However, the key feature is that the slits down one side of the pipe insulation have self-sealing properties – most commonly in the form of self-adhesive strips. This makes the installation process quick and simple, with no adhesive needed in hard-to-reach areas.
Pipe wrap insulation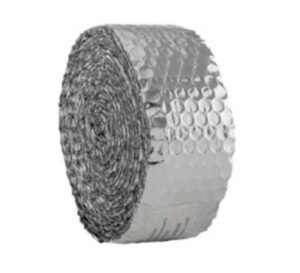
Pipe wrap insulation can also be manufactured from a variety of materials, but is installed by wrapping it around the pipe like tape. Not fitting over as a solid form, like foam insulation.
One form of pipe wrap insulation is foil-faced bubble membrane insulation, which is supplied in a tape form. A good choice to reduce the potential of freezing for cold pipes. However, it can also be used to retain the heat in hot pipes.
Installing foam pipe insulation
Insulating a pipe with a foam pipe insulation sleeve is relatively straightforward; certain steps should be followed to ensure the pipe insulation performs well.
What you’ll need:
- Pipe insulation
- Tape
- Tape measure
- Knife
Step one: Measuring and choosing insulation
To ensure you have the correct size of pipe insulation, measure the diameter of a visible section of pipework. Choose a pipe insulation size that is most suitable for your pipework diameter. Then measure the length of the pipes that you’re going to insulate, to calculate how much insulation you require.
Step two: Cutting and installing insulation
Once you’ve chosen the pipe insulation, measure the first length of pipe you’ll be working on. Take a knife and cut the pipe insulation to the required length, then open the foam insulation at the ready-made slit and slide the insulation over the pipe.
To seal the insulation, either:
- Remove the strips on the self-adhesive insulation; or
- Add an adhesive
We’d also recommend using duct tape or insulating tape to secure adjacent pieces of foam pipe insulation together.
Step three: Handling corners and bends
Once you reach a corner or bend in the pipework, there are various options for installing the pipe insulation.
For 90-degree sharp bends
If reaching a 90-degree sharp bend, take the knife and cut the pipe insulation at a 45-degree angle. Then put the two pieces of insulation over each side of the 90-degree bend in the pipework. Now twist them so that the two ends fit together flush. Then use duct tape or insulating tape to secure them together.

For 90-degree curved bends
There is a slightly different method for a 90-degree curved bend. Instead of cutting the pipe insulation in half, notches will need to be cut on one side of the insulation instead. The notches should be roughly 30 degrees and almost cut through the insulation completely, but with some insulation remaining uncut.
There should be two notches cut out like this next to each other. Once you’ve cut the notches, fit the pipe insulation onto the pipe, with the notches on the inside of the 90-degree bend. The notches will allow the insulation to bend at the corner and will need sealing with tape to ensure it is secure and no heat loss occurs.

Step four: Addressing T branches
Another point at which foam pipe insulation needs cutting is at T branches within the plumbing system. To create a piece of insulation that covers a T branch, cut a 90-degree wedge out of the main section of pipe insulation. This will allow the insulation to be fitted on the main pipe with space for the other pipe to branch off.
Then, to form a point, take a separate piece of insulation and cut the end at two 45-degree angles. This point then should fit neatly into the 90-degree cutout in the main piece of insulation. Finally, tape the joints together to ensure no heat loss occurs.

Installing pipe wrap insulation
Pipe wrap insulation is often considered an easier alternative when insulating a complex plumbing system. This is because it is a straightforward insulation process. Plus, pipe wrap insulation easily fits around joints and bends without any extra work.
Here are the steps you need to follow.
Step one: Beginning installation
To install pipe wrap insulation, tape one end of the insulation to the pipe. Then, wrap the insulation around the pipe, aiming for tight spiral loops with overlaps of half an inch or more.
Step two: Ensuring full coverage
When installing pipe wrap insulation, it is crucial to ensure that no areas are left exposed and that the insulation doesn’t slip as you move along the pipe.
Step three: Completing installation
When you reach the end of a pipe or the end of the insulation, simply tape the insulation into place.
Tips to ensure pipe insulation performs well
To ensure your pipe insulation continues to perform well, we recommend checking it annually. Ensure all areas of the pipes are covered and that the insulation remains in good condition.
If needed, replace the tape that is securing the joins between pieces of insulation. Alternatively, replace sections of insulation that appear worn out or look damaged to keep the insulation performing well.
It’s important to ensure all areas of the pipe network are insulated, so the pipe insulation remains effective. Often, there are gaps where pipes run through a wall or floor. These can contribute to a loss of heat or increased risk of freezing.
So, we’d recommend filling these gaps wherever possible, using caulk, small sections of pipe insulation or even spray foam insulation.

Was this guide useful?
Mentioned in this project guide:


Armacell EVO Armaflex Self-Seal Pipe Insulation Full Boxes 2m Lengths - Thickness 19mm
from
£234.00 Incl. VAT

Armacell EVO Armaflex Self-Seal Pipe Insulation Full Boxes 2m Lengths - Thickness 13mm
from
£192.00 Incl. VAT