Bath panels are more than simple aesthetic improvements. Although you might be getting one for that reason alone, there’s more to why bath panels are needed and how you fit one will depend on various factors. Here’s more about the bath panel and how to fit a bath panel to help keep your bathroom looking fabulous.
Table of contents
Fitting a bath panel
If you’re a keen DIYer, you’ll love doing this fitting as it can be a money-saving alternative to hiring a professional.
What you will need
- Bath panel
- Tape measure
- Gloves
- Hacksaw
- Sealant
- Adhesive
- Wooden battens
- Drill or screwdriver
- Screws
- Spirit level
Now onto fitting the bath panel!
Step one: Get your measurements
You’ll need to note down the height and length of your bath. Measure from the rim of the bath to the floor to note panel height, then measure along the length of the bathtub to get the panel length.
Note: Odd-shaped bathtubs will likely need this more to confirm the size of the panel.
Step two: Cut off any excess from the panel
If your panel is too high or too short, you can use your hacksaw to cut off the excess. Gently pull and push the saw slowly to minimise the risk of uneven cuts or damage being caused to the panel. You can now put the panel back against the bath, checking its level and a correct fit using the spirit level.
Note: Be aware of pipes or skirting boards when cutting the panel; cut somewhere away from these areas to avoid causing damage.
Step three: Time to use battens
How you attach the battens will depend on the number of panels you intend to fit.
- One panel:
For the one panel, an ideal placement for the battens is at the bottom of the panel to keep it sitting upright against the floor of the bathroom (like tiles). This also makes the seamless connection between the floor and the panel.
- Two panels:
When forming an ‘L’ shape with two panels for your bath, use wooden battens to make sure these two pieces connect. Softwood is required if you’re using screws, as it can make screwing into the surface easier. Alternatively, you can use a high-strength adhesive to attach the battens.
Note: If using a plinth for the panel, ensure the battens leave enough space for you to work.
Step four: Using a plinth
Sometimes a plinth will come pre-attached. If you are using a plinth that isn’t attached, cut it to size (if incorrect) using steps one and two. Once it’s cut, you can use adhesive to attach it to the main panel.
Tip: You can use PVA glue to create a waterproof seal on the edges of bare wood. This can be on the plinth or the panel.
Step five: Testing the placement of your bath panel
Once preparations are complete, you can test the positioning of the panel(s) to ensure that they fit against the bath and the wall.
Place the panel against the wall, marking where it meets, and then remove the panel. Take a single batten and line it up on the edge of the mark between the rim of the bath. Use adhesive or screws to attach the batten to the wall. Do this for each point where the panel meets the wall.
For fitting an ‘L’ shaped bath panel, the sturdiness will affect whether you can leave it free-standing or fixed.
For panel replacement, the batten may already be attached to the wall for the panel to be secured against. In this case, you can apply adhesive to the panel and stick it to the batten. Then place a batten on the back of the panel and attach it to the wall batten. If a wall batten is not already in place, you might need to attach one.
Step six: Fixing your bath panel in place
Now for the big event, the panels! Apply adhesive to the inside of the panel ends where the panel will meet the wall batten. Move the panel into position and attach the panel to the batten. Quickly wipe off any excess adhesive that escapes.
Step seven: Seal the new bath panel
Apply silicone sealant between the joins of the panel and wall. This provides a watertight and smooth finish.
Fitting an acrylic bath panel
Fitting acrylic bath side panel fittings is a similar process to that of wooden bath panel fittings. The only difference is that you need to get the length of rebated wood or timber for each panel being fitted.
Rebated wood features a groove cut into the edge. This groove is typically where you can slot the panel under.
So, here’s the process with slight differences to suit fitting acrylic bath panels.
Step one: Get your measurements
Place the panel against the bath, note the measurements and adjust as needed (may include cutting). Test the placement of the panel.
Step two: Note where the panel will be sitting
Make a mark for where the panel is going to sit and line the rebated wood/batten against this mark. If it fits correctly, the bottom lip of the panel should slot into place along the grooved edge. If not, adjust the rebate until the panel smoothly fits in place.
Step three: Attaching the rebate
You can use screws and an electric drill or adhesive for this step (screws are advised for fixing). Once chosen, fix the rebate to the floor.
Note: For safety and to prevent risk of damage, you must check for pipes and wiring with a detector before drilling into the floor.
Step four: Fitting your new bath panel
Slot the bath panel(s) in place and voila! Your gorgeous new bath is ready!
Want some more bathroom tips? Check out our other Help and Advice articles for information about a vast array of plumbing advice.
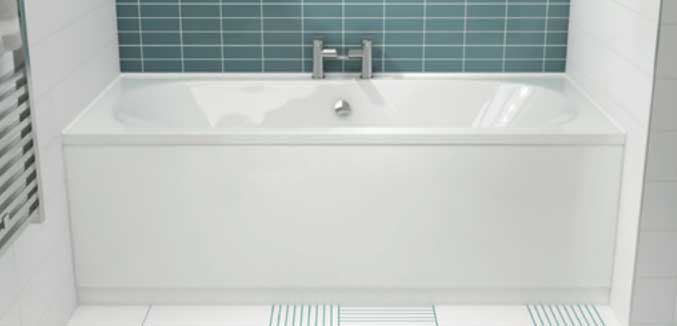
What is a bath panel?
The bath panel is more common in straight baths (single or double-ended). They’re used to hide away plumbing, as well as the underside of the bathtub. They also protect the floor underneath the container from splashes.
Typically, there is at least one bath panel for a bath, with a maximum of three if required. If more are needed, these can cover both ends, both sides and the front of the bath, depending on the position of the container.

What size bath panel do I need?
Bath panels are usually available with the bath or created in similar sizes to conventional baths. In the UK, our most common bath size is 1700mm (1.7m) long. However, these sizes can vary. So, you must take measurements to find the right bath panel for your bath.
Some of the variations for front bath panels (the longest part of the bath) are as follows:
| Size (mm) | Size (m) | Part of bath |
| 1500mm | 1.5m | Front bath panels* |
| 1600mm | 1.6m | Front bath panels* |
| 1700mm | 1.7m | Front bath panels* |
| 1800mm | 1.8m | Front bath panels* |
| 700mm | 0.7m | |
| 750mm | 0.75m | |
| 800mm | 0.8m | Bath side panels** |
| *Longest part of the bath ** Ends of the bath | ||
Most bath panels are also non-adjustable. So, you will have to adjust them yourself by cutting them to the height/and or length needed. Look out for the tiles, pipework and skirting boards as you do so.
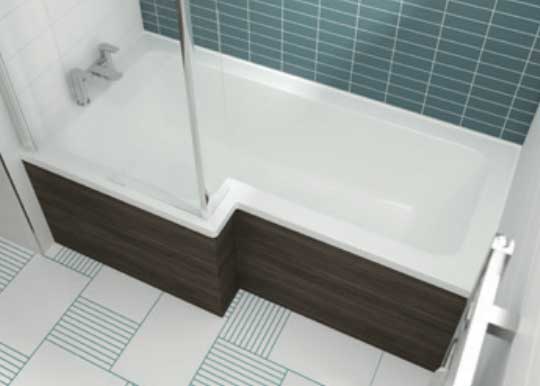
It’s also important to note that most bath panels are single, fixed-height panels. However, two-piece bath panels do exist. Though they typically come with one panel and a separate plinth to attach it to the back.

Was this guide useful?
Mentioned in this project guide: